How to Create the Ultimate Hideout for Your Golden Hamster
Welcome to the world of golden hamster care! These delightful creatures require a safe, cozy, and stimulating environment to thrive. One of the most crucial components of their habitat is a well-designed hideout. This article will guide you through creating the perfect hideout for your golden hamster, covering everything from selecting the right type to ensuring safety and comfort.
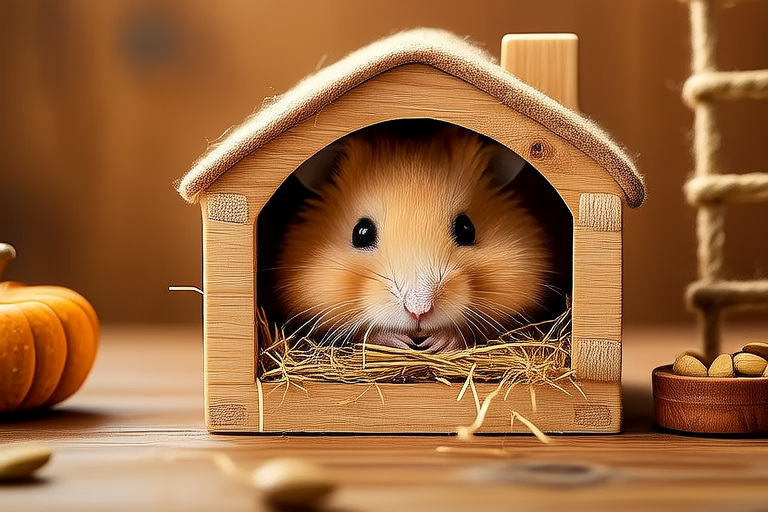
Selecting the Right Type of Hideouts
The first step in building the ultimate hideout for your golden hamster is choosing the right type. There are several options available, each with its own advantages:
- Plywood Hideouts: These are ideal for DIY enthusiasts. They offer a customizable option that can be tailored to fit the specific needs of your hamster. Plywood hideouts provide excellent insulation and can be easily modified to include ventilation and entry points.
- Commercial Hideouts: These come in various shapes and sizes, offering a wide range of designs and materials. Commercial hideouts are often made from plastic or cardboard, providing durability and ease of cleaning. However, they may not always offer the same level of customization as DIY options.
- Shoe Boxes: Shoe boxes make excellent hideouts due to their size and availability. They can be easily customized with cut-outs for ventilation and entry points. Shoe boxes are also inexpensive and readily available, making them a popular choice among hamster owners.
When choosing a hideout, consider factors such as size, material, and ventilation. A hideout that is too small can cause stress, while one that is too large may not provide the sense of security your hamster needs. Ensure that the hideout has adequate ventilation to prevent heat buildup and allow fresh air circulation.
Necessary Materials
To create the ultimate hideout for your golden hamster, gather the following materials:
- Plywood (if constructing a DIY hideout): Choose a thickness that provides sufficient insulation and durability. A standard thickness of 6mm is recommended for most DIY hideouts.
- Sandpaper: This will help you smooth out any rough edges on the plywood.
- Non-toxic wood glue: Use this to secure pieces of the hideout together. Ensure the glue is non-toxic and safe for pets.
- Screwdrivers and screws: These tools will help you assemble the hideout if it comes in parts. Ensure the screws are small enough not to pose a choking hazard.
- Paint: If desired, you can paint the hideout to match your hamster’s habitat. Use non-toxic, pet-safe paints only.
- Cardboard: For DIY hideouts, cardboard can be used to create partitions or additional layers of insulation. Ensure the cardboard is free from staples or tape that could harm your hamster.
- Scissors: These will be useful for cutting out ventilation holes and entry points in the hideout.
- Hamster bedding: Once the hideout is assembled, line it with soft, absorbent bedding to create a comfortable sleeping area for your hamster.
Step-by-Step Instructions for Construction or Assembly
Building the ultimate hideout for your golden hamster is a rewarding project that can be completed in a few simple steps. Follow these instructions to construct or assemble your hideout:
For DIY Plywood Hideouts:
- Measure and Cut: Measure and cut the plywood to the desired dimensions for your hideout. Ensure the dimensions are appropriate for your hamster’s size and activity level. A good rule of thumb is to provide at least twice the length of your hamster’s body.
- Smooth Edges: Use sandpaper to smooth any rough edges on the plywood. Rough edges can be dangerous for your hamster and may cause injury.
- Assemble: Use non-toxic wood glue and screws to assemble the hideout. Ensure all joints are secure and the hideout is stable. You may need to reinforce certain areas with additional pieces of plywood or cardboard.
- Add Ventilation: Cut out ventilation holes in the sides or top of the hideout. Ensure the holes are small enough to prevent your hamster from escaping but large enough to allow air circulation.
- Paint (Optional): If desired, paint the hideout with non-toxic, pet-safe paint. Allow the paint to dry completely before introducing it into your hamster’s habitat.
- Line with Bedding: Once the hideout is assembled and painted, line it with soft, absorbent bedding to create a comfortable sleeping area for your hamster.
For Commercial Hideouts:
- Inspect: Before introducing the hideout into your hamster’s habitat, inspect it for any sharp edges, loose parts, or potential hazards. Remove any packaging or protective materials that could harm your hamster.
- Assemble: If the hideout comes in parts, follow the manufacturer’s instructions to assemble it. Ensure all pieces are securely attached and the hideout is stable.
- Customize: Customize the hideout by adding ventilation holes or entry points if necessary. You can also add bedding to create a more comfortable sleeping area for your hamster.
- Introduce: Introduce the hideout into your hamster’s habitat and observe your hamster’s reaction. Ensure the hideout is placed in a quiet, undisturbed area of the habitat.
Safety Considerations
Creating a safe hideout for your golden hamster is paramount. Follow these safety guidelines to ensure your hamster’s well-being:
- Avoid Choking Hazards: Ensure there are no small parts or objects that could pose a choking hazard for your hamster. Check the hideout regularly for any loose or damaged pieces that could become a danger.
- Prevent Escape: Ensure the hideout has secure entry points and ventilation holes that are small enough to prevent your hamster from escaping. Check the hideout regularly for any gaps or openings that could allow your hamster to escape.
- Ensure Proper Ventilation: Provide adequate ventilation to prevent heat buildup and ensure fresh air circulation. Poor ventilation can lead to respiratory issues and other health problems for your hamster.
- Check for Sharp Edges: Smooth any rough edges on the hideout to prevent injury to your hamster. Rough edges can cause cuts or scrapes, leading to infections or other health issues.
- Monitor Temperature: Ensure the hideout is placed in a temperature-controlled area of your hamster’s habitat. Golden hamsters thrive in temperatures between 68-79°F (20-26°C). Extreme temperatures can cause stress and health problems for your hamster.
Tips for Making the Hideout Comfortable and Stimulating
To make your golden hamster’s hideout both comfortable and stimulating, follow these tips:
- Add Soft Bedding: Line the hideout with soft, absorbent bedding to create a comfortable sleeping area for your hamster. Popular choices include shredded paper, wood shavings, and fleece liners. Avoid using cedar or pine shavings, as they can be harmful to your hamster’s respiratory system.
- Incorporate Tunnels: Add tunnels or passages to the hideout to encourage exploration and exercise. Tunnels can be made from cardboard tubes, PVC pipes, or commercial hamster tunnel toys. Ensure the tunnels are the appropriate size for your hamster and do not pose any choking hazards.
- Provide Nesting Material: Offer your hamster nesting material to build a cozy nest within the hideout. Popular choices include tissue paper, cotton wool, and small pieces of fabric. Avoid using string or yarn, as they can pose a choking hazard.
- Include Toys: Place toys inside the hideout to keep your hamster entertained and stimulated. Toys can include chew sticks, small balls, and puzzle feeders. Rotate the toys periodically to keep your hamster engaged and prevent boredom.
- Position Correctly: Place the hideout in a quiet, undisturbed area of your hamster’s habitat. Ensure the hideout is away from direct sunlight and drafts, which can cause discomfort or health issues for your hamster.
By following these tips, you can create a hideout that is not only safe and comfortable but also stimulating and enjoyable for your golden hamster. Regularly monitor the hideout for signs of wear and tear, and replace or repair any damaged parts as needed.
In conclusion, creating the ultimate hideout for your golden hamster requires careful consideration of design, materials, and safety. By selecting the right type of hideout, gathering the necessary materials, and following the step-by-step instructions provided, you can build a cozy, secure, and stimulating environment for your furry friend. Remember to prioritize safety and comfort, and regularly check the hideout for any signs of wear and tear. With a little effort and creativity, you can provide your golden hamster with the perfect hideout to thrive in.